How to Remove an Object from a Photo and Check the Result

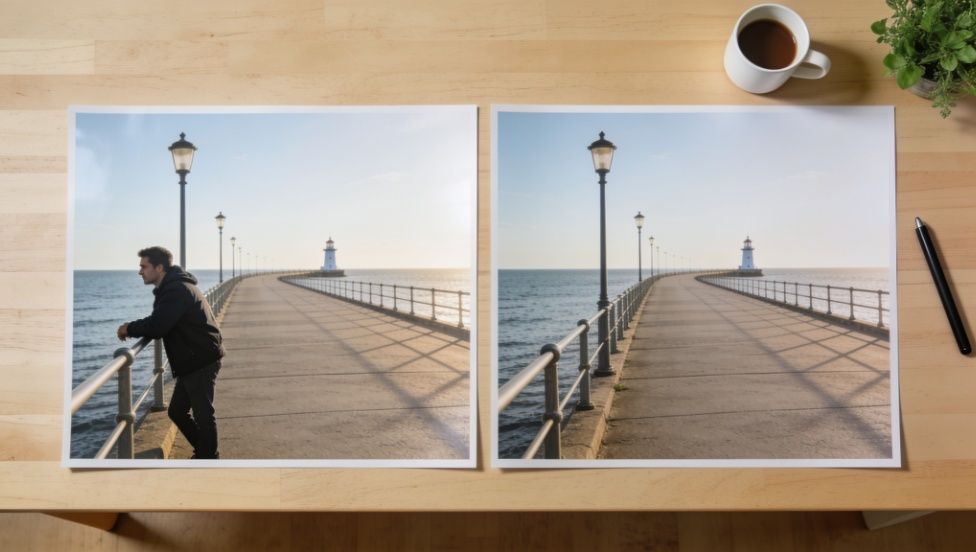
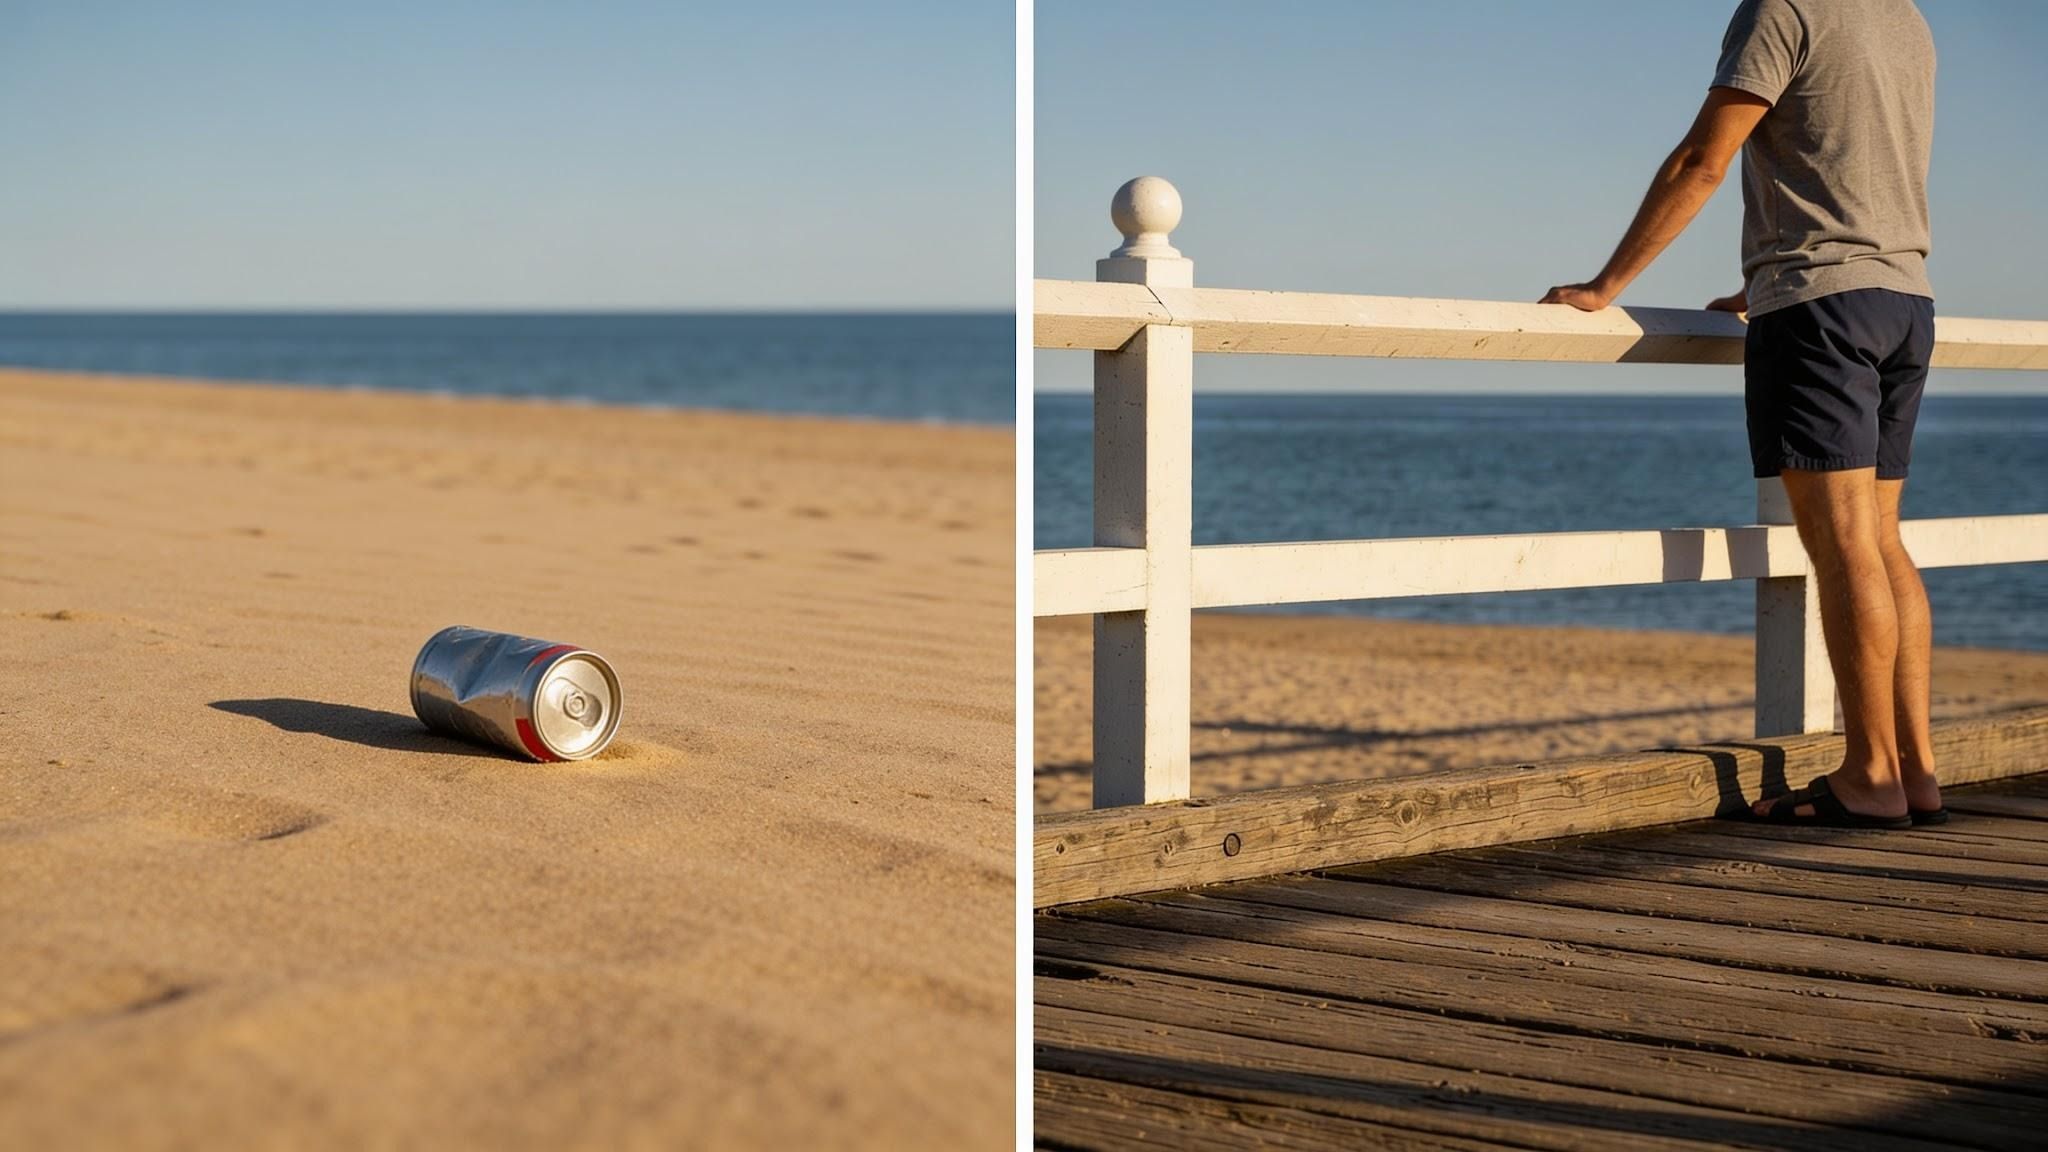
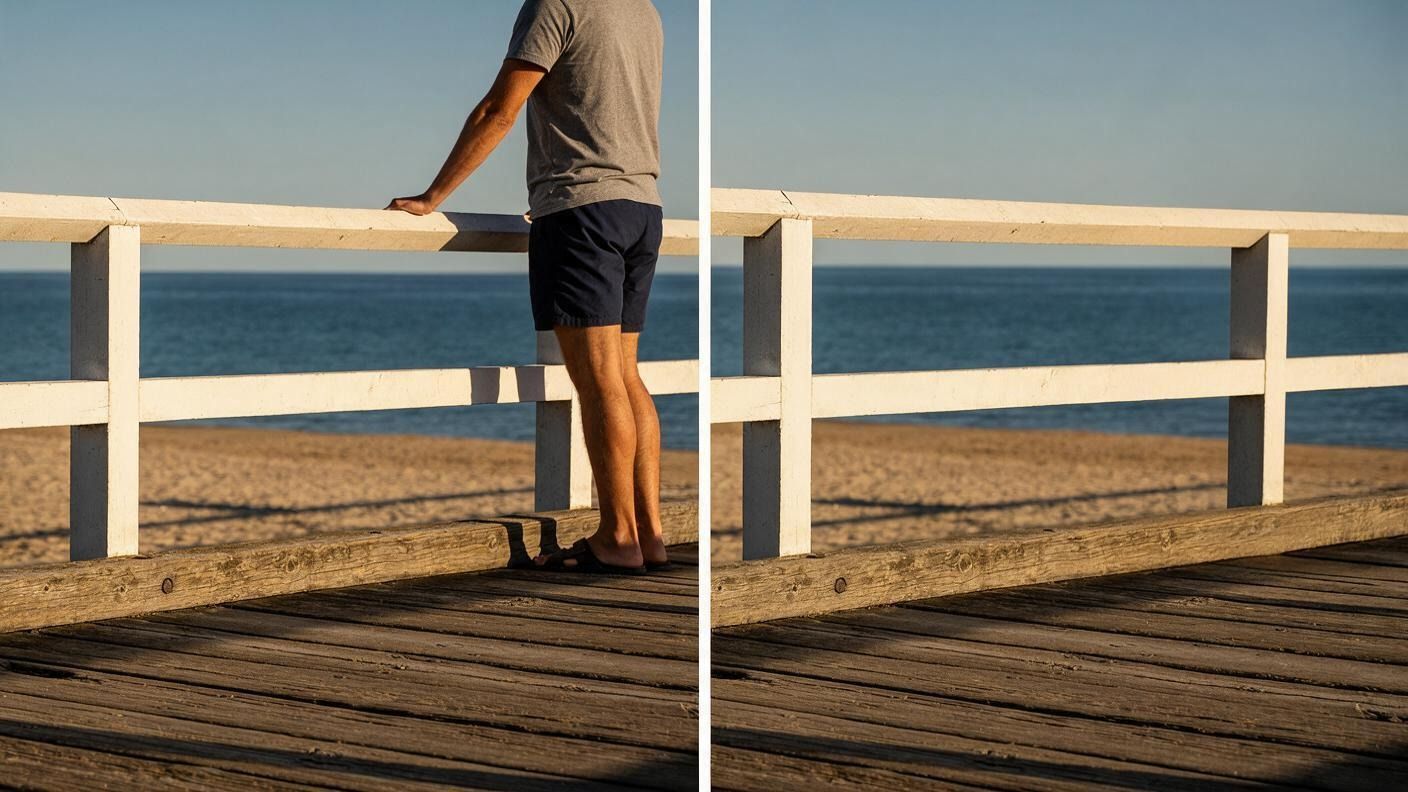
To remove an object from a photo, select it with a small margin and its shadow, let the tool fill the gap from the pixels around it, and then compare the edit with the original up close. The removal itself takes seconds. The check is what decides whether anyone notices: a shadow with nothing left to cast it, a kink in a railing, or a faint outline where the object stood gives the edit away. How hard the job is depends more on what's behind the object than on the tool. A soda can on a sandy beach is easy. A man leaning on a boardwalk railing is harder, because the fill has to continue lines your eye knows well.
What Makes an Object Easy or Hard to Remove
Every AI object remover has to invent the pixels the object was hiding. It studies the area around the gap and predicts what most likely belongs there. With grass, sky, water, or sand, almost any plausible texture passes, so small mistakes stay invisible. With straight lines and repeating patterns, the same small mistakes stand out.
Size raises the difficulty fast. The authors of the LaMa inpainting paper point out that a wide hole has many plausible fillings, and that a model working on the middle of it may see nothing but missing pixels. The bigger the gap, the more of the result is guesswork.
Four questions tell you how much work is ahead:
Does anything behind it run in a line or repeat? Railings, tiles, bricks, a horizon, or window frames have to line up again on the far side of the gap.
Does it touch what you're keeping? A bag strap over a shoulder or a hand on a table leaves an edge the tool has to rebuild without biting into your subject.
Does it leave marks somewhere else? A shadow on the ground, a reflection in a window, or a ripple in water belongs to the object and has to go with it.
Does anything thin pass across it? Strands of hair, branches, and wires need to carry on through the patch, not stop at its edge.
How to Remove an Object from a Photo, Step by Step
- Work on a copy. You'll need the original for comparison, and it lets you start over if a fill goes wrong.
- Try cropping first. If the object sits near the edge of the frame, a slightly tighter crop removes it without inventing a single pixel.
- Select generously. Include the object's shadow and any reflection, plus a few pixels of margin around its outline; a tight selection leaves a faint halo in the object's color.
- Split large objects into smaller passes, and remove several objects one at a time. Smaller gaps leave less to guess, and you can redo one bad section without starting over.
- If your tool works from text prompts, describe what should fill the space instead of what to remove.
- Check the result twice: zoomed in to 100% for seams and smudges, and at the size people will see it, such as a phone screen, for anything that looks wrong as a whole.
Prompt-based editors need step five most. In an image-to-image editor like DaVinci's, you upload the photo and write the change you want, and naming what belongs in the space gives the model a target. As of November 2026, DaVinci's page for the tool also warns that the model can alter nearby details, so keep the instruction narrow and say what has to stay the same.
How to Check an Object Removal for Mistakes
Most removals that look wrong fail in one of seven ways, and each has a fix that doesn't mean starting over. Put the original and the edit side by side, or flip between them in the same window, then go through the edited area one problem at a time.
Leftover shadows and reflections: the object is gone, but its shadow on the floor or its reflection in a window stayed. Select the shadow on its own and remove it in a second pass.
Halos: a faint outline in the object's old color. Expand the selection by a few pixels and fill again.
Smooth patches: the filled area has less grain than its surroundings, so it reads as a smudge. Add a little matching noise, or fill again with a larger selection.
Light and color mismatch: the patch is slightly brighter, cooler, or flatter than its neighbors. Adjust its brightness and color until the seam disappears.
Repeated patches: the same clump of grass or cloud shape shows up twice. Select the copy and fill it again so the tool picks texture from a different area.
Broken lines: a horizon, railing, or tile joint bends or stops where the object used to be. Redo a narrow strip along the line, or continue it by hand with a clone or healing brush.
Changes outside the selection: a nearby face, hand, sign, or the edge of your subject looks different. Undo and run the edit again with a smaller area or a more specific prompt.

Zoom out before you call it done. A patch that looks clean up close can still stand out in the full frame, and a seam you spotted at 100% may be invisible at normal size.
Common Removals and What to Watch For
How to Remove a Person from a Photo
Remove each person together with their shadow and anything they're carrying or touching, such as a bag, a phone, or feet on the pavement, then check the edge of whoever you're keeping. Where a stranger overlaps your subject, stop the selection at your subject's outline and look closely at that edge for softness or a missing piece of hair or clothing.
Crowds take more planning. Removing one person often uncovers part of another who was half hidden behind them, and the tool has to rebuild or remove that person too. Two or three people on a busy street is a realistic edit; clearing a whole plaza usually isn't.
How to Remove a Person or Object on an iPhone
You may not need a separate app. Newer iPhones have a removal tool built into the Photos app, called Clean Up, and older models can use a browser-based editor instead. Whichever you use, the fill is still a prediction, so the checks in this article apply on a phone too.
Wires, Cables, and Power Lines
Thin objects against the sky are easier than they look. Work in short sections along the wire instead of selecting it in one go, and look closely where it crosses a roof or a tree, since the tool has to carry those edges through the gap.
Scratches and Dust on Old Scans
A few dust spots on a scanned print are object removal at a tiny scale, and a spot-healing brush handles them. A worn print with tears, fading, and dozens of scratches is a different job. A tool built for AI photo restoration repairs the damage as a whole: DaVinci's version says it fills in scratches and seals tears, and it also warns that restoration can alter small features, so compare faces with the original.
Objects in Front of Text or Signs
Text is the hardest background to fake. Text that sits on top of the photo, like a caption or a sticker over a plain area, is far easier to remove than lettering that belongs to the scene. If a lamp post blocks part of a shop sign, the fill will produce shapes that look like letters but don't spell anything. Crop the sign out, keep the post, or rebuild the letters by hand from another photo of the same sign.
When to Keep the Object in the Photo
Some photos are records. A product listing, a rental inspection, an insurance claim, or a news photo has to show what was actually there, and removing a scratch, a stain, or a person changes what the image says. Keep the untouched file for anything that documents a real condition, and if you edit a copy for another use, don't present it as the original. Edit only photos you own or have permission to change, and don't remove watermarks, since they identify who made the image.
Quick Checklist
Original saved; editing a copy.
You own the photo or have the owner's OK to edit it.
Cropping tried first for objects near the edge.
Selection covers the shadow, any reflection, and a small margin.
Large objects removed in smaller passes.
Lines, patterns, and repeated patches inspected up close.
Faces, text, and your subject's edges compared with the original.
Full frame viewed at the size people will see it.
Drafted with AI assistance and reviewed by Buğra Demir. Last updated: November 2, 2026.
More from DaVinci Blog